To use Client-Initiated Backchannel Authentication (CIBA) features, you must have an Enterprise Plan or an appropriate add-on. Refer to Auth0 Pricing for details.
- Configure the CIBA grant type for your application
- Enable notification channel(s) for your application
- Configure the notification channel for CIBA
Prerequisites
Before configuring CIBA for your application, make sure you set an authentication method for your application. You can use any authenticatino method, including mTLS authentication, Private Key , and authentication, with the CIBA flow. To set the authentication method for your application, read Credential Settings.Configure CIBA grant for your application
You can configure CIBA for your application with the Auth0 Dashboard or Management API. There are some restrictions on the types of clients that can use the CIBA grant type. You can only use the CIBA grant type if:- The client is a first-party client i.e. the
is_first_partyproperty istrue. - The client is confidential with an authentication mechanism, i.e. the
token_endpoint_auth_methodproperty must not be set tonone. - The client must be OIDC conformant i.e. the
oidc_conformantmust betrue. This is the default for all new clients.
- Auth0 Dashboard
- Management API
To configure CIBA for your application with the Auth0 Dashboard: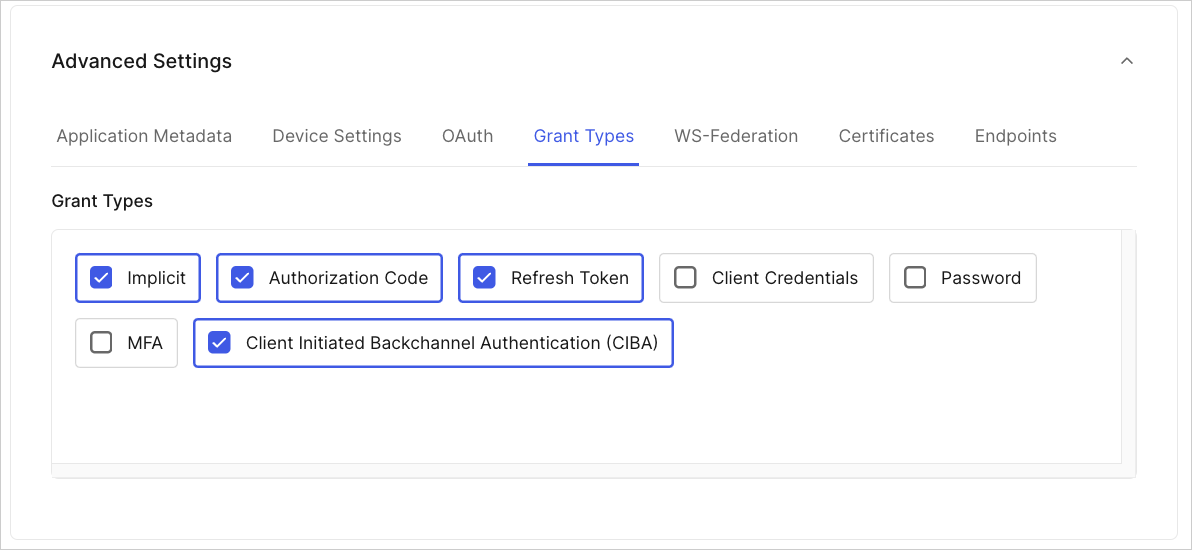
- Navigate to Applications > Applications in the Auth0 Dashboard.
- Create an application and then enable Client Initiated Backchannel Authentication (CIBA) under the Grant Types tab:
- Click Save Changes.
Enable notification channels for your application
To use Client-Initiated Backchannel Authentication (CIBA) features, you must have an Enterprise Plan or an appropriate add-on. Refer to Auth0 Pricing for details.
requested_expiry parameter to determine which notification channel to use. The requested_expiry determines the maximum duration for which the CIBA session should be valid in seconds:
- Mobile push notifications: If you set your
requested_expiryto a value of 300 seconds or lower, CIBA uses the mobile push notification channel if enabled. - Email notifications: If you set your
requested_expiryto a value between 301 and 259200 seconds (72 hours), CIBA uses the email notification channel if enabled.
- Auth0 Dashboard
- Management API
To configure the notification channel for your application with the Auth0 Dashboard: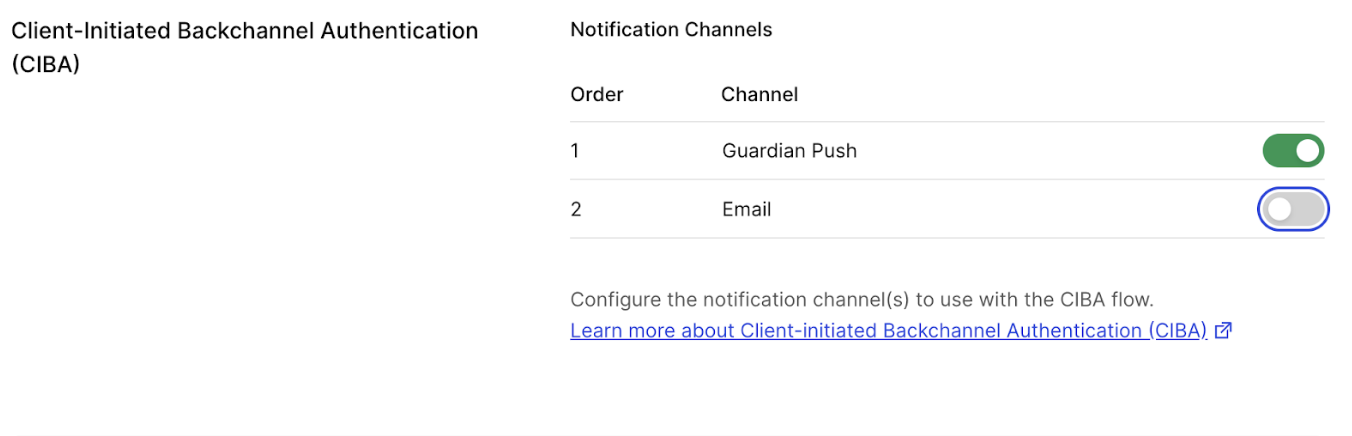
- Navigate to Applications > Applications.
- In your application settings, go to the Client Initiated Backchannel Authentication (CIBA) section and select the notification channel(s) to enable.
Configure notification channel
Once you have enabled the notification channel(s) for your client application, configure the notification channel for the CIBA flow:Configure mobile push notifications
To send mobile push notifications with CIBA, you can use:- The Auth0 Guardian app
- A custom app integrated with the Auth0 Guardian SDK
- Enable Auth0 Guardian push notifications
- Enroll the authorizing user in MFA using push notifications
Enable Auth0 Guardian push notifications
Use the Auth0 Dashboard to enable the Auth0 Guardian Push Notification factor for your tenant. In the Auth0 Dashboard:- Select Security > Multi-factor Auth.
- Enable Push Notification using Auth0 Guardian. This may require some configuration settings. To learn more, read Configure Push Notifications for MFA.

- For Push Notification App, select your desired app.
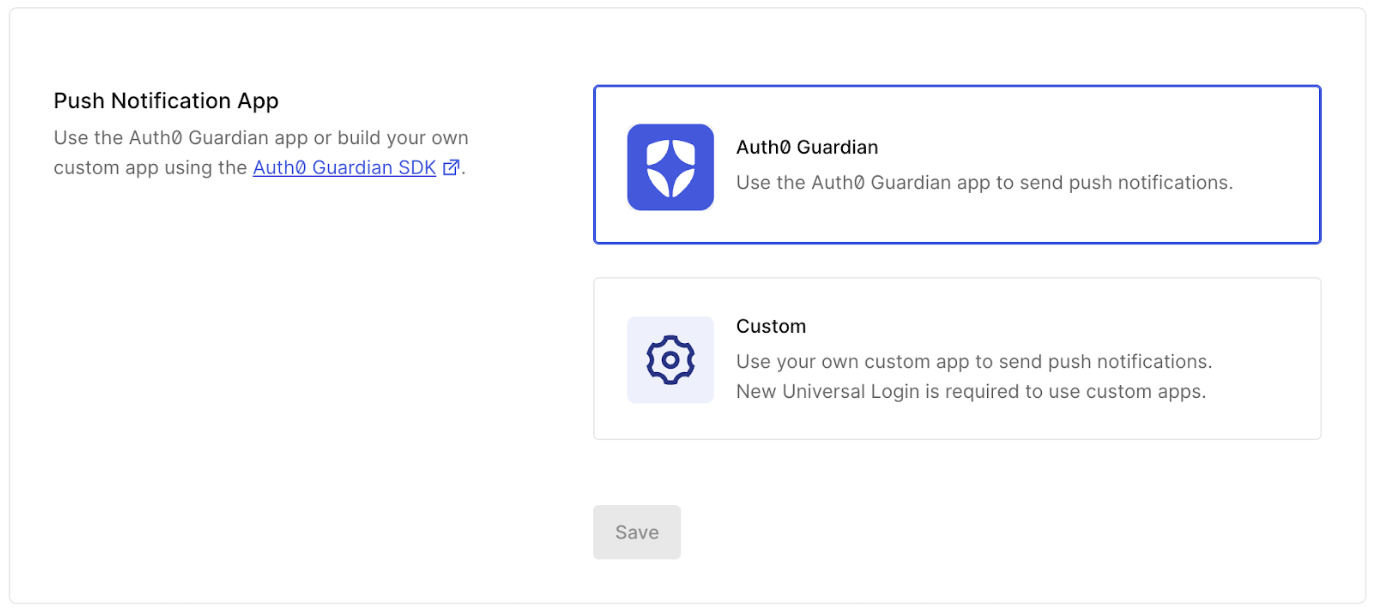
- Click Save.
Enroll the authorizing user in MFA using push notifications
If the user is not enrolled to use MFA push notifications, Auth0 falls back to using email notifications, if configured, instead of rejecting the CIBA request.
Configure email notifications
To use email notifications with CIBA, you need the Auth0 for AI Agents add-on with a paid plan. To learn more, read Auth0 Pricing.
- Configure your email provider
- Configure your email template to use the Asynchronous Approval template
- Ensure the authorizing user has a verified email address
Configure your email provider
While you can use Auth0’s built-in email provider to test email delivery in your development and test environments, you must set up your own email provider to use email notifications with CIBA in a production environment. To learn how to set up your own email provider, read Customize emails.Configure your email template
To configure the Asynchronous Approval email template:- Auth0 Dashboard
- Management API
- Navigate to Branding > Email Templates.
- For Template, select Asynchronous Approval from the dropdown menu.
- Fill in the rest of the template settings by following the Configure template fields instructions.
Ensure the authorizing user has a verified email address
If the user does not have a verified email address, Auth0 rejects the CIBA email request.
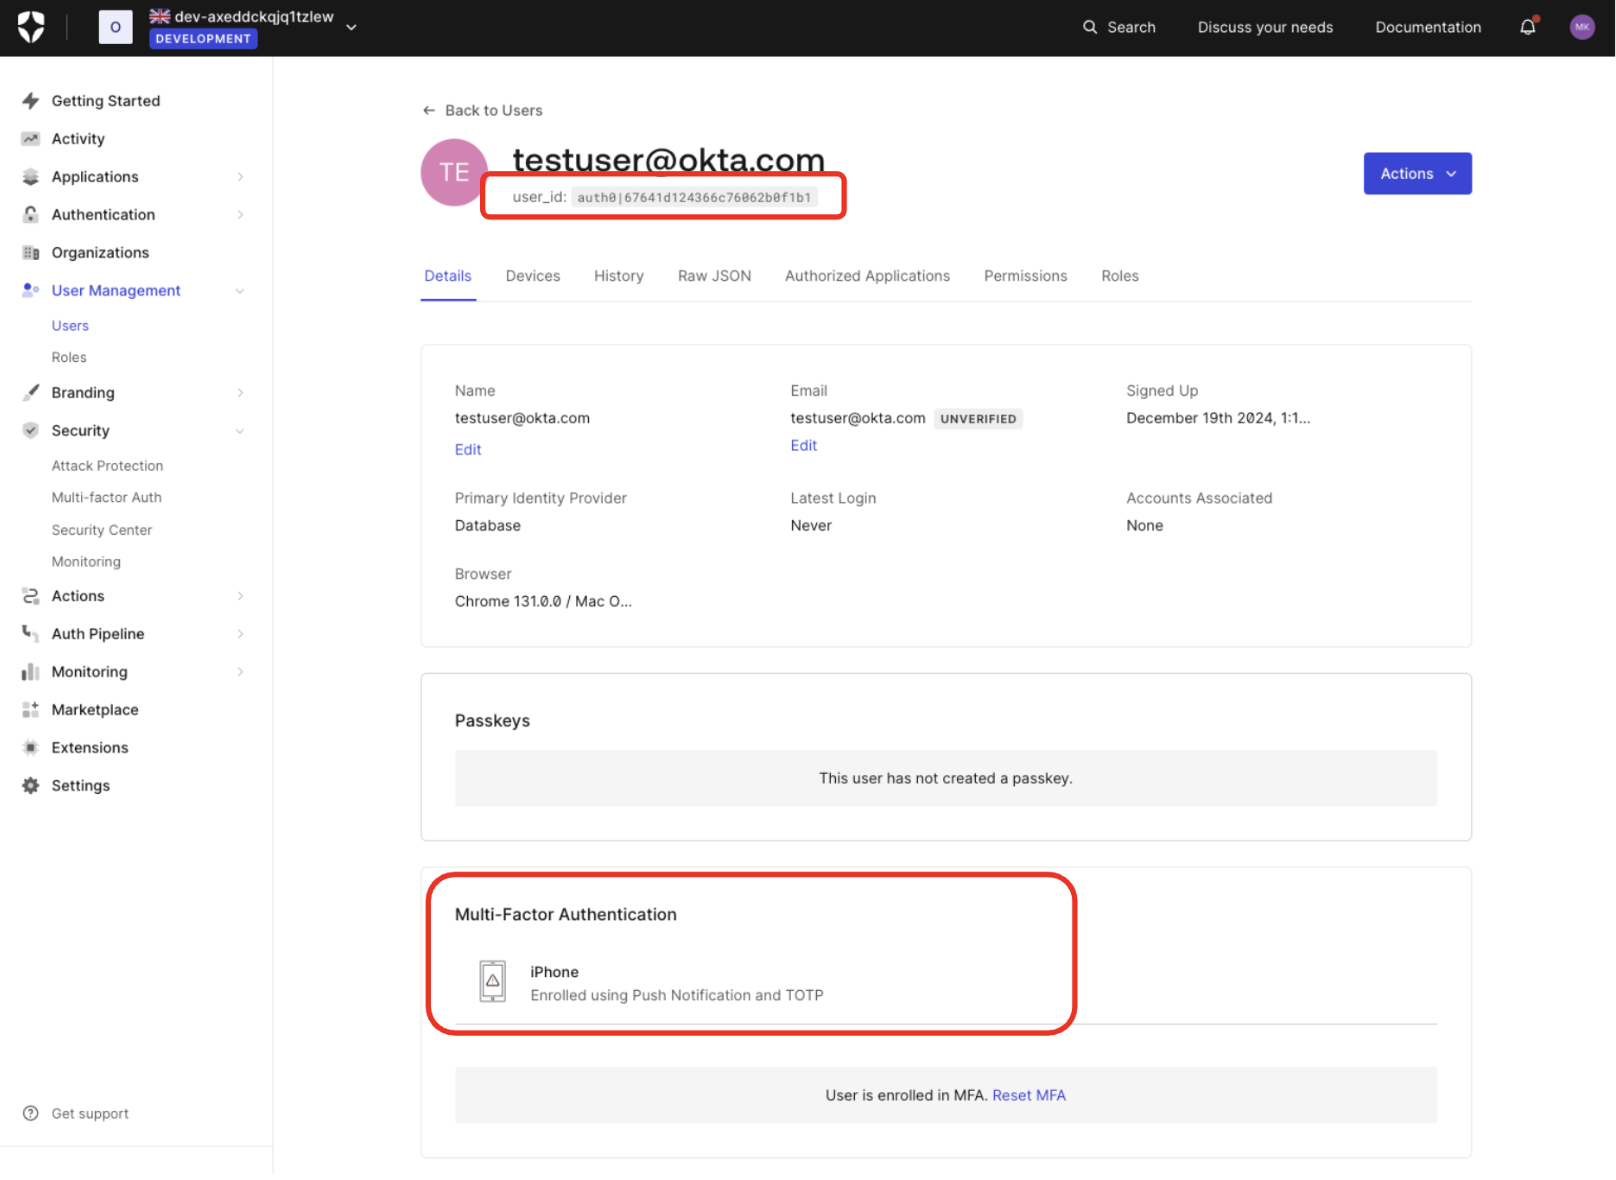
- Navigate to User Management > Users and click on the user.
- Under Email, the user should have a verified email address listed.